Monday, November 05, 2007

Now it’s time to say goodbye to all our family

Shawl_Finished5
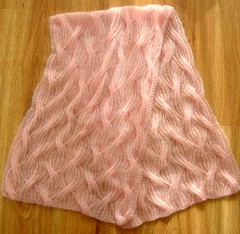
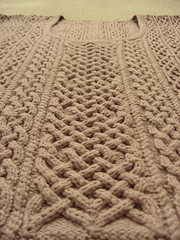
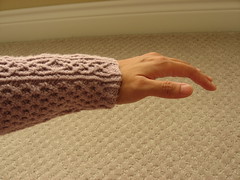
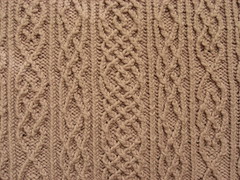
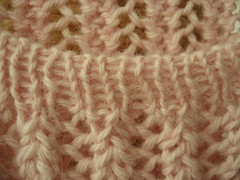
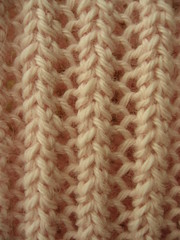
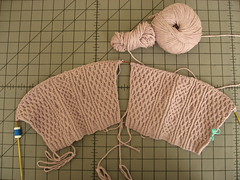
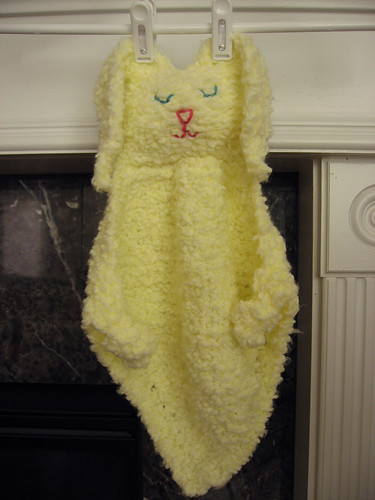
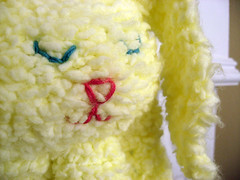
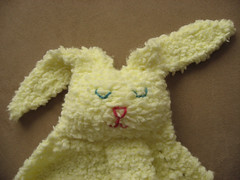
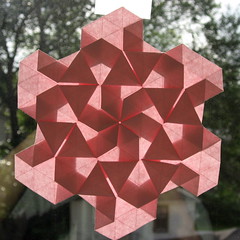
Last spring I made the decision to give up this blog. I thought I would time my departure to coincide with either the public opening of Raverly or the completion of Morrigan—which ever came last. Well, both took longer than I imagined they would. I don’t want to wait around for Raverly to open up at this point. And ending the blog with Morrigan is a ending on a great high note. (Considering this blog began about the time I started work on the Reversible Rib Shawl, it’s only fitting that I should end with a similarly beautiful piece.)

RachelAndMe.jpgI have had this blog for nearly three years now and I love some parts of being a blogger. For example, I love the way that my blog has connected me with people from around the world. I have “met” many other bloggers who I consider my friends even though I haven’t actually seen them in person. And some of my old friends have re-connected with me after finding my blog. I also loved receiving comments. I truly appreciate every comment that I have gotten on this blog. So a big “Thank you!” to everyone who has ever left a comment here (except for the spammers, I’m not thanking the spammers).

But what I didn’t like about keeping a blog was the pressure. All bloggers are under pressure to produce: “Be witty!” “Be informative!” “Be consistent!” “Be interesting!” As a blogger, I know that to maintain readership, I have to give in to those pressures.

ScoutDragon
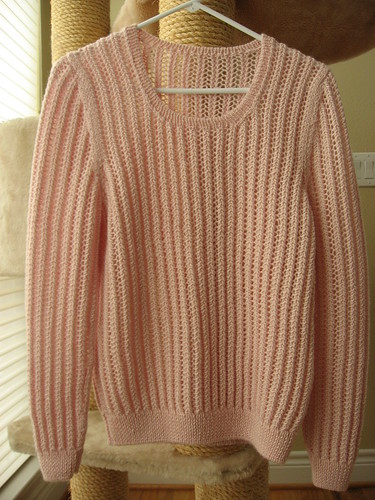
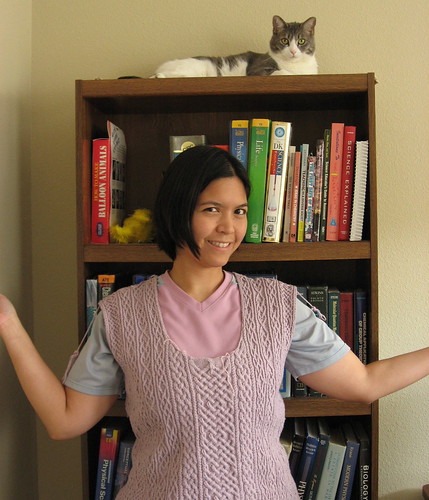
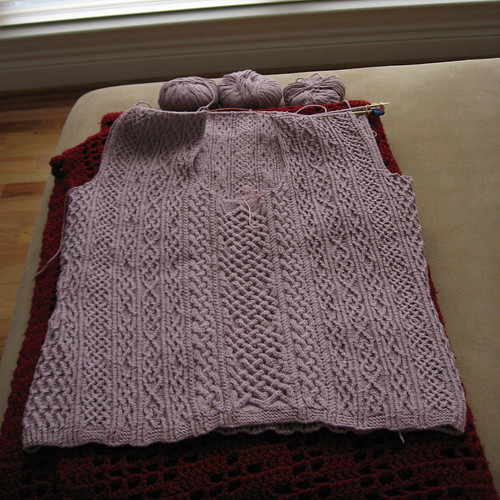
Of course, the pressures have a different level for me as a knit blogger. I have chosen to include very little about my personal life on this blog. So in order for me to have blog material, I have to KNIT something. For the first 2.5 years of this blog’s life, I happily produced knitted object after knitted object for my enjoyment and as well as for blog fodder. But things have changed. Thanks to repetitive stress injury in my left hand, I can’t knit as much as I used to. The injury is making knitting less enjoyable and the added pressure of the blog makes knitting more of a chore these days. So I’m slowing down on the knitting, and giving up this blog.

But I am not giving up knitting OR blogging completely! If you want to keep up with what’s going on in my knitting life, you have several options.

Raverly, for those of you who are Ravelry enabled. (My Ravelry name is MiniLaura):
http://www.ravelry.com/people/MiniLaura

Flickr:
http://www.flickr.com/photos/minilaura/

And a new blog:
http://www.houseofwoolrepute.com/

ScoutReid
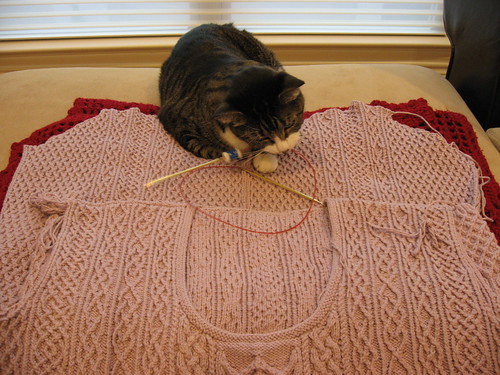
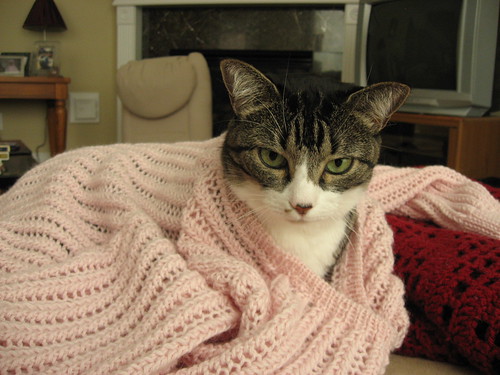
The House of Wool Repute is my new online home. It is a group blog and the “group” factor will hopefully reduce the pressures on me. The wonderful women contributing to the blog are all knitters, but most of the others dabble in other crafts. You can expect to see knitting, spinning, and dyeing on a regular basis and there will probably be many cute animal photos (Scout!) and some foodie talk. Please come visit us! We’re just getting started up, so please stay tuned! It should be fun and entertaining to read.

Oh, and I’m not going to delete this blog. I’ll leave it up and I will answer any questions that you have, so feel free to email me or leave a comment!

And with that, dear friends, I am signing off. Thank you so much for reading and for coming into my life!

NewEngland.jpg

Monday, October 15, 2007

Peace Breaks Out

Morrigan1_color correct2.jpg
(A more accurate representation of the color can be found here.)


A peace treaty in the War of Morrigan was signed on Saturday October 13, 2007. The war lasted about 6 months. Battle was difficult because Morrigan fought dirty with chart errors, non-errors, and ambiguities (discussed below). My battle plan was further complicated by row-gauge issues that I never discussed in this blog. Those gauge issues resulted in much math. In the end, I was victorious having knit, purled, cabled, and calculated the pattern into submission.

cabley1.JPGThe war was not without injuries, though. The tendonitis in my left hand has gotten significantly worse since I started Morrigan. It progressed from occasional stabs of pain in the back of my left hand to shooting, long-lasting, whimpering-inducing pain in my hand and forearm. It was particularly bad during the last few days of knitting when I was feverishly trying to finish.

At times, I completely abandoned my fight, preferring to work on projects that either used larger needles, consumed less yarn, or required less mental effort. In the time between cast-on and finishing of Morrigan I finished:

1 vest for Peter (started before I cast on for Morrigan)
2 baby-sized super secret projects for Kristen
1 adult-sized super secret project for Kristen (not blogged or even photographed)
1 pair of adult socks
1 lace shawl
1 crocheted cap
1 baby sweater and hat set
1 bunny
1 mouse
1 bear
1 sweater for me

The Stats:
Pattern: Morrigan by Jenna Wilson in No Sheep for You, size small
Yarn: Rowan Calmer, 75% cotton, 25% microfiber, color 462 Chiffon, 11 balls
Needles: 2.75 mm and 3.25 mm (US sizes 2 and 3)

Modification 1: I changed the depth of the armholes because my row gauge was too large. The wonky row gauge meant that my sleeve cap would be taller than it should be. I couldn’t modify the sleeve cap, so I had to modify the armhole. (Why I couldn’t modify the sleeve cap and how I calculated the correct depth of the armholes is a long story. Email me for the gory details.)

sleeve length.JPGModification 2: I lengthened the sleeves by 4 cm. When my arms hang down at my sides, the cuffs cover the base of my hand. But when I stick my arms out straight, the cuffs end perfectly at my wrist. That’s the way that I like my sleeves.

Comments:
I’ve already made a lot of comments about this pattern. Why not add a couple more?

1) Forgive me Amy Singer for what I’m about to say. If I could wave a magic wand, I would change the yarn in this sweater into fingering- or sport-weight 100% merino wool. I think the pattern would have been easier to work in wool and I think the end result would look nicer in wool. Calmer is a wonderful yarn, but I think I’ll stick with wooly cables from now on.

(Notice I said, “If I could wave a magic wand.” I didn’t say, “If I knit this again” or “If I could do it all over.” As wonderful as this sweater is, I will never, ever knit it again.)

cabley2.JPG2) And a final word about the pattern. The instructions for the sleeve bind-off is a bit ambiguous. You work four short rows and then the instructions say to bind off all stitches loosely. Well, when you finish the short rows, a little more than half of the live stitches are on the left needle and a little less than half of the live stitches are on the right needle. You can’t just bind off the stitches.

I worked across the stitches on the left needle (hiding the wraps on those stitches), turned the work to the wrong side, and bound off all the stitches (hiding the remaining wraps). I emailed Jenna to confirm that that was what I should do she said that it was just one of three alternatives.
Alternative 2: Break yarn after the short rows, put all stitches on the left needle, join a new yarn at the beginning of the right-side row and bind off all the stitches. This alternative would work fine, but you would have more ends to weave.

WithScout.JPGAlternative 3: After the short rows, place all stitches on a piece of waste yarn, and GRAFT (not sew, graft) the live stitches to the shoulder seam. This, in fact, was what Jenna intended but it was changed to a bind-off by the book editors. I did attempt this, but after grafting ¼ of the stitches on the first sleeve, I decided it was too aggravating for the raw and harried state of my nerves.

Parting words of thanks:
A big THANK YOU to Jenna Wilson for all her help with Morrigan. I sent her many emails and she always answered in a gracious and timely manner even though most of my emails were pointing out problems with the pattern.

Thank you also to Karen Frisa, the tech editor of the pattern, for her willingness to comb over the intricacies of the pattern with me.

And finally, thank you to everyone who has cheered me on through this long journey. Your words of encouragement helped motivated me to keep pushing on.

Sunday, October 14, 2007

Aperture and Depth of Field

Teaser Trailer:
Coming tomorrow (assuming the weather cooperates for the photos): The end of the Morrigan Saga. Yes, she's finished.

Featured Presentation:
This week's lesson: Use aperture to change the depth of field on photos.

Assignment 1: Use a large aperture to isolate a subject by making the background blurry. I'm thinking about trying some Scout photos, but I haven't gotten around to it yet. I did head to the garden center to try some flower photos. The one shown below is my favorite, though it may not be the best of the bunch. The rest can be seen on my Flickr page.

HangingPinkFlowers.JPG


Assignment 2: Use a small aperture to show a large (deep? long?) depth of field. The class instructor said to have something "interesting" in the foreground but also have things in focus in the background. I thought the alligator below would make a good photo, but was a bit disappointed when I went for the photo shoot.

Alligator.JPG


I couldn't really get a good angle on the alligator. I couldn't move to the left because there was a large utility box there. If I went to the other side of the utility box, the background became less interesting and the huge Starbucks logo became visible.

If the weather cooperates tomorrow, I'll head out to a sculpture garden. I should have gone there in the first place, but I remembered that it existed only today. And it's raining today.

Friday, October 12, 2007

A Picture Worth . . .

. . . much more than 1,000 words.

priceless.JPG

Tuesday, October 09, 2007

Playing with Shutter Speed, Week 2

This week's assignment was to use long shutter speeds in night photography. We didn't have any other specific instructions. So I decided to do one "traditional" shot and one showing moving lights.

On the way home for class last week, I spotted the fantastic neon sign shown below. I went to the restaurant three times to take photos. (The sign wasn't fully lit up the first night that I went out.) Thankfully, no one came out of the restaurant and told me that I couldn't take photos.

Pappas_top3_r.jpg

For the second photo, I wanted to get Houston's downtown skyline in the background with streaks of light from car headlights and taillights in the foreground. The challenge was finding a place to take the photo. I knew I had to find a bridge close to downtown that had a sidewalk large enough to set up a tripod and didn't have an obstructed view. Unfortunately, I don't know the roads around downtown very well because I don't like to drive there. But fortunately, I found this photo on Flickr and was able to blatantly rip it off. Here's another version where I got more headlight streaks than taillight streaks. The headlights are a bit too blown out.

skyline1_ps2_r.jpg

Saturday, October 06, 2007

More Morrigan Errors

Another quickie, photoless post.

Morrigan is in the home stretch. I've finished the sleeve increases and am working toward the sleeve cap.

I found two more errors in the pattern.

1) After completing the sleeve increases, the pattern says to repeat rows 19–24 or 7–12 (depending on size) of charts R3 and L3 until the sleeve is the right length. You should repeat rows 17–24 or 5–12 to keep the pattern correct.

2) Row 23 of chart L3 is missing a cable crossing. The position and type of the cable crossing should be obvious to anyone who has gotten that far on the sleeve.

Wednesday, October 03, 2007

A yarn for all the Eph knitters out there

Most knitters know Webs--the huge yarn store and mail-order wearhouse near that other college. Webs has its own yarn line called Valley Yarns. The names of Valley Yarns are taken from towns and cities in Massachusetts. For some time now I've been pouting because there wasn't a yarn named after Williamstown. Pouting time is over. This is how Webs describes the new yarn:
Williamstown takes it’s name from the college town in the Berkshires that tourists and natives love for the quaintness of its buildings and greenery, and the happy surprise of the sophistication that is found in those buildings. Our yarn is much the same, a seemingly straightforward wool/acrylic blend with little surprises of color in each strand. Take it with you for vacation knitting as you tour colleges or go leaf-peeping.
As soon as I find a pattern to make with this yarn I'm buying a bunch. Sadly, none of the yarns are very purple.

Monday, October 01, 2007

Playing with Shutter Speed, Week 1

This week’s assignment: show motion by adjusting the shutter speed. A three-part assignment.

Part 1: Use the panning technique to show motion.

Peter1_ps.jpg

Reason #3,948,023 that I love Peter. Peter generally prefers to run in the morning before the sun comes up. And when it is hot outside, he doesn’t wear a shirt or a hat while running. But this weekend, he dressed in the clothes that I picked out and went running in the park so I could take panning photos. My wonderful husband ran back and forth on a path in the middle of the day while I took his photo over and over again. And he never complained once. He even said he’d go out again if I didn’t get a good photo.

Part 2: Use a short shutter speed to freeze motion.

SuperDog2_ps.jpg

My original plan for this photo was to have Scout jumping for one of her toys. She and I “practiced” for days. Unfortunately, our “practice” sessions consisted of me throwing the ball in the air and Scout watching it and swatting it once it hit the ground. So I had to go the dog park. I’m not sure which dog photo to take to class. The one shown was the one that was the most in focus. But this one seems to tell a better story because you can see the toy that the dog is jumping after. Plus, the dog made a splash when it jumped.

Part 3: Use a long shutter speed to show motion with a blur.

AmGenNight2_crop.jpg

I’m in agony about this one. I took a nice photo the first night I went out, but it was overexposed and grainy. The next time I went out I got a better exposure, but the composition of the photo was not as good (photo is shown). I took daytime photos as well. I’m seriously thinking about going out there a fourth time tonight to take MORE photos. (Technically, night photography is the next lesson, but the daytime photos are simply not as dramatic.)

More photos can be seen on my Flickr page.

Tuesday, September 25, 2007

Finished Object: A Tribute to Valerie

I always accuse Valerie of copying me (because she does!), but in reality, she and I simply have similar taste in knitwear and yarn. We are of one mind. I decided that instead of her trying to be me and me trying to be her, I should just WEAR her.

Val.JPG

Pattern: Val from RYC’s AM to PM booklet
Yarn: RYC Baby Alpaca DK, 100% alpaca, color 200 Blossom, 10 balls
Needles: 2.75 mm, 3.25 mm, and 4.0 mm (US sizes 2, 3, and 6)
Comments:

TubeCO.JPG• Another sample knit for Yarntopia. They wanted something relatively simple and none of the stockinette patterns jumped out at me, so I picked this one. I’m very happy with it. Such a lovely stitch pattern—the parts between he eyelets look braided to me. It was a quick and easy knit. (I could even working on it while watching movies with subtitles!)

• But just because something is easy doesn’t mean you can’t make it technically challenging. First challenging feature: tubular cast on! I have practiced the tubular cast on, but this was the first opportunity that I’ve had to use it on a garment. Boy is it pretty! However, the version of the tubular cast on that I used isn’t as stretchy as I would like. I the future, I will try other methods.

TubeBO.JPG• Challenging feature number two: Tubular bind off! First time that I’ve ever done it. Again, very pretty. It took me a bit to figure out how tight to pull the yarn during the bind off, so the first bit of the bind off is a little more sloppy than the rest. But I’m still happy.

• Challenging feature number three: Shortened sleeves. I’m sure that doesn’t sound very challenging, but let me explain. The stupid schematic made it impossible for me to easily find out the finished sleeve length. So I didn’t know if the sleeve was going to be too long or not. (Past experience with RYC patterns tells me that either I have abnormally short arms or British models are mutants with abnormally long arms.)

BraidedPattern.JPGTo determine my correct sleeve length, I measured from the back of my neck to my wrist and measured some well fitting sweaters. I needed a sleeve about 76 cm long from the back of my neck to wrist. Next, I had to measure the shoulder length of the completed back piece and subtract it from the back-to-wrist length to find the total sleeve length: 76 – 17 = 59 cm.

THEN I had to count the number of rows in the sleeve cap, multiply the number of rows by the row gauge to find the length of the sleeve cap, and subtract the sleeve cap length from the total sleeve length: 59 – 18 = 41 cm.

So 41 cm was the length of the sleeve before the sleeve cap shaping. Lo and behold, the math worked perfectly. The sleeves are the right length!

I’m sure you’ve all noticed that I’m not wearing the sweater in these photos. Trust me, it fits well. I tried doing the self-timer thing and no amount of good lighting, good focusing, and good photo composition can make up for awkward poses and goofy facial expressions. So I had to resort to Scout-modeled photos.

ScoutVal.JPG

(In case you are wondering: Getting Scout into the sweater was not a problem at all. She liked it! Her own alpaca sleeping bag! Getting her out was not as easy. She didn’t want to leave. No, she’s not a stuffed cat.)

Friday, September 21, 2007

A good thing, a bad thing, and an other thing

A Good Thing

Furry, fuzzy, pink yarn! Sarah sent me some amazing pink angora. “Vintage!” she said. Apparently it is from stash that she inherited from a relative. It came in a little box and I really want to play with it. But it looks so nice in the box and (as evidenced by the messy looking ball in the lower right corner of the box) I’m unable to put the yarn back into the box as nicely as it was before. Thank you so much Sarah!

PinkAngora.JPG

A Bad Thing

I knitted another sweater for Yarntopia. That’s not the bad thing. The yarn is yummy, the sweater is well designed, and the pattern was clear—all that was good. The bad thing was the schematic. What’s the point of this schematic? It doesn’t contain any information to make it useful! All the measurements in it could be read of the pattern. But to make a bad thing even worse: That’s not the sweater in the pattern! The schematic shows nice, feminine waist shaping. The sweater has straight sides. Sigh!

BadSchematic.JPG

An Other Thing

I’ll bet that you thought “An Other Thing” was a typo. It’s not. My other thing is that I’m pursuing a new hobby. This week, I went back to school to take a Basics of Photography class at the Rice University School of Continuing Studies. I want to know how to use all those manual settings on my camera. I want to know how to take better photos.

Needles1r.jpg

As a result, I think my knitting and certainly my knit blogging will slow down over the next few months. However, I will be uploading feeble attempts at completing my class assignments on my Flickr page. I even created a new collection for the class. Each assignment will go in its own set. I can only show two photos per assignment to the class, so comments on the photos posted are welcome, appreciated, and desperately wanted.

Friday, September 07, 2007

A Really Long Post

This post was originally twice the current length. Seriously. Apparently I thought I was so important that I needed to say much more. The first version of this post was a description of all my trials and tribulations with Morrigan (so far). But I decided that it would be too boring for anyone not making Morrigan. I considered not publishing the post at all, but thought that those 15 or so of you who are knitting Morrigan might actually want to read what I have to say. So I present a two-part post: Part 1 is general interest and Part 2 is obsessive compulsive ramblings about Morrigan.

Part 1: Finished Object: Baby Bobbi Bear

Bobbi.jpg

Pattern: Baby Bobbi Bear published by Blue Sky Alpaca
Yarn: Blue Sky Alpaca Sport Weight (100% baby alpaca), natural white, 3.5 hanks and scraps of natural light tan
Needles: 5.5 mm (US size 9) DPNs
Comments:
Drew gave me the kit to make this bear. I love love love the bear, the yarn, the pattern—EVERYTHING!

ScoutAndBobbi.jpg• Like S t a c i before me, I ran out of yarn. S t a c i had graciously offered her extra yarn, but I didn’t take it because I wanted an excuse to visit Twisted Yarns. I had never been to that store before and I thought that it was time to go. While I was there I picked up yarn for another Baby Bobbi Bear (did I tell you that I love this pattern?) and I stumbled upon the most gorgeous shade of Silky Wool that I had ever seen. (Click the link! See the pretty yarn!) I bought it with the intention of making the Twisted Yoke Cardigan from the latest Interweave Knits, but now I think it is destined for something else.

• I have not yet determined if the cats are a threat to Bobbi. I haven’t had the courage to allow Bobbi to sit out unsupervised. So far Scout has attacked Bobbi’s ribbon and Cleo has licked Bobbi. Was Cleo getting a taste of Bobbi for future feasting? I don’t know and I don’t want to find out.

Part 2: Morrigan “Errors”

Things happened as I was knitting the body of Morrigan. Everything worked out fine for me, but I went through a lot of charting and mathing and thinking and discussing and waffling to finish the body of the sweater. (This is the real reason why it took me so long to get from the armpits to the shoulders on Morrigan.)

MorriganSleevesAfter all that, I was pretty sick of Morrigan and I jokingly said that I was thinking about turning Morrigan into a vest. I really had no intention of making a vest. In fact, I’ve started the sleeves. But anyway, onto the business at hand.

If you are looking for tips, hints, or errata for Morrigan, you have two choices: Easy or Convoluted.

Easy:
Other than the teeny-tiny error that I found in Chart B, the instructions for the body of Morrigan are completely correct. Do not follow the correction to the side chart that I mentioned in an earlier post.

Convoluted:
Part 1: The Side Chart “error” and its ramifications
I posted the Side Chart corrections on the No Sheep for You KAL. It just so happened that the person who tech-edited the pattern saw my post and commented on it. Apparently, the “error” was in the original pattern but the tech-editor didn’t realize it was an error. (Which is completely fine, the pattern still works, the error really is just a matter of esthetics.) But here’s the rub: The tech-editor worked out ALL the stitch counts from the armpit up with the “error” in there! What’s the problem? If you correct the “error” in the way that I posted your stitch counts will not match the stitch counts in the pattern.

MorriganShoulder1Okay, I’m highly math enabled. I can rework stitch counts, no problem. Thankfully, I decided that I would work out the stitch counts BEFORE I started any “error” correcting. With the help of math, a diagram that I built in Excel, and a careful study of the photos in the book, I noticed something interesting about the “error” and my possible correction. Look at the photo. Along the shoulder seam there is a column of twisted knit stitches. Very elegant, don’t you think?

That column of stitches is Chart F in the pattern. If I corrected the “error” I would not have that nice, strong column of stitches next to my shoulder seam. Instead, Chart C (that pretty cable next to the column of stitches) would be right up next to the seam. So I had a dilemma: Fix the “error” as my anal retentive side said or ignore it to please my artistic side. I chose to ignore the “error.” (gasp!)

Part 2: The error that both there and not there
I should pause for a moment to tell you that as I was working through all these error/no error issues, I was corresponding heavily with the tech-editor. She’s a saint. I think I love her.

In our email conversations, she noted that when you finished working all the armhole and neck shaping, you would have three more stitches on the back shoulders than you would have on the front shoulders. However, one must have the same number of stitches on the front and the back to do a proper three-needle bind-off. So, Ms. Tech-Editor told me, she had worked in decreases on the back shoulders to get rid of the extra stitches. I checked my math, confirmed what she said, and went on my merry way.

But then I got an email from someone else who was making Morrigan. Janis had surged ahead of me during all my mathing and charting and futzing. She was up to the shoulder shaping already and had a question about what she believed to be missing markers. Somewhere in the back shoulder shaping, the instructions say something about knitting to a marker and turning. The marker indicated one side of the back neck shaping.

What Janis didn’t realize (or forgot) was that the markers for the back neck shaping were placed on the VERY FIRST ROW of the pattern. Janis had placed markers all around her Morrigan and didn’t realize that back neck shaping markers were different from all the other markers on her needles. Anyway, I didn’t email Janis back immediately because she emailed me at night and I didn’t check my mail until the morning. So she emailed Jenna, too.

So by the time I did check my mail, I had the original question from Janis and a forwarded correction from Jenna in my in box. (Jenna also took the opportunity to point out that someone was beating me on Morrigan.) But wait! It gets more exciting!

Jenna ALSO didn’t realize that the back neck markers were already placed! So in her correction, she added a line right before the back shoulder shaping instructions saying to place markers X many stitches from each side of the back. BUT what I immediately realized was that the originally placed markers were not X number of stitches away from the sides. In fact, the original makers were X+3 stitches from each edge.

You see what’s happening, don’t you? The whole time Jenna meant for the number of stitches on the shoulders to be the same. The markers placed in the very first row are placed in the wrong place! Each marker should be placed 3 stitches closer to the center of the work.

But if you do this, you should not do the decreases on the back that get rid of the extra stitches because the extra stitches will not be there! If you move the markers to the corrected positions and do the decreases, you will end up with 3 fewer stitches on the back shoulders than you have on the front shoulders. (Whew! did you follow that?)

So what did I do? I moved the markers and didn’t do the decreases because it made much more sense to work it that way.

If you managed to read all of that: Congratulations! Sorry it was so long, but you know what it says at the top—I use too many words to describe what I’m doing.

Friday, August 24, 2007

Purple Mountain Majesty

Hey Williams knitters! I know you're out there because every now and then one of you emails me and says that you read my blog. Here's your chance to actually leave a comment on my blog.

Have you seen these?

Purple Mountain Socks

The pattern is from Sweaterscapes. I really want these socks. But it's a combination of two knitting things that I don't like: socks and intarsia (I think. It could be stranded, but that doesn't improve things that much.)

I want them so much that I'm tempted to say that I'll buy the pattern and the yarn if someone else would knit them for me. Tempted. Very tempted.

Monday, August 20, 2007

Doily!

Doily

Pattern: Doily by a doily designer
Yarn: A doily-appropriate yarn. Seems to be 100% cotton. Dark Green
Needles: Doily-size needles. Something small. Maybe US 0 or 1.
Comments: Okay, you caught me. I didn’t knit this doily. Monkee did. When she finished it, she threw it at me. She said I could have it if I wove the ends, blocked it, and blogged about it. So here it is: ends woven and trimmed, blocked, and blogged.

Does the fact that I have a pink phone surprise anyone?

[Note: the following is a change in topic without any type of transition]

LOOKIE!!!

MorriganVest

(Can I tell you how tempted I am to do the neck edging, add edging around the armholes, and call it a vest?)

Tuesday, August 14, 2007

Boing! Thump!

Did you hear that? That was me jumping on the bandwagon. What prompted this fit of unoriginality in me? Well my friend M and his wife H surprised me by having a baby. Now I say “surprised” in the most tongue-in-cheek way. M and H have produced kids like clockwork: every two years in June or July a new addition to their family. The first four kids are a girl, a boy, a girl, and a boy. Last fall, I was talking to M on the phone (they live in Austin) and I jokingly asked if H was pregnant. He said yes. Then I teased that baby #5 would most certainly be a girl. (M and H never find out the gender of their children in utero.)

Well, M and H had baby #5, a girl, in mid-July. From their track record, I knew that this would happen even before H got pregnant—it wasn’t a surprise at all. But for some reason, I chose to ignore the impending arrival. When I heard the news about the new baby, I realized that I needed to knit something. Fast.

So for M and H’s newest bundle of joy, a February Baby Sweater and a Vine Lace Baby Hat.

NinaPresent

Pattern: Baby Sweater on Two Needles (actually, I used only one circular) by Elizabeth Zimmermann and Vine Lace Baby Hat by Sandi Wiseheart
Yarn: RYC Cashsoft DK, color 520, 3 balls
Needles: 3.75 mm (US 5) for the sweater and 3.5 mm (US 4) DPNs for the hat

Comments:
In complete lemming form, I paired the hat with this sweater after seeing it on Guro’s blog. It just reinforces the fact that I could not think for myself on this project.

SlipStitchEdge.JPGThe sweater pattern is not difficult. It should have been knit in a few hours with no problems. However, this is me. I made an easy sweater hard:

* After knitting four or five rows, I decided that the front edges would looks so much better if I used a slip-stitch selvedge. So I ripped and started over.

* After knitting a few rows past the first increase row, I decided that the increases looked better on the wrong side of the work. So I ripped back to two rows before the increase row and increased on a wrong-side row instead of a right-side row.

Increases.JPG* Apparently, my mind decided to take a vacation when I started the second sleeve. The sleeves start by casting on 7 stitches on each side of each sleeve. I managed to do this properly on the first sleeve. But I cast on stitches only on one side on the second sleeve. That’s right: I followed the directions correctly THREE TIMES and then screwed up on the fourth time. Rip, rip, rip.

But all in all, I’m happy with the project. Despite all my foibles, I still managed to finish the two items in three days. Cute, fast, and PINK! Thanks for having a girl, M and H!

Friday, August 10, 2007

I’m such a dabbler

TriangleTwistsFrontSome time ago I teased you with a photo of a craft that I had recently tried. For some reason (laziness), I never got around to blogging about it. The photo I showed back then was an example of origami tessellation. Last month I took classes at a local store during their origami festival. I took two tessellation classes from Joel Cooper. (Please click on his name to see his amazing work. Look at his Masks and Tessellations sets. I cannot describe how incredible his work is.)

I learned a lot from Joel by my work is not quite up to his level. If you want to see more of what I’ve made you can go here. Sadly there isn’t a book from which I can learn more about tessellations—it appears to be a try-it-and-see type of craft.

And speaking of other crafts that I do (good segue, huh?), I decided to answer the craft meme seen on Grumperina’s blog. I segregated the crafts listed under #3 because, apparently, I’m quite a dabbler.

1. I have no interest; complete lack of creativity in this area.
card making, cartooning, collage, decorating, doll house making, etching, gift wrapping, lucet, shibori, spinning, stamping, straw marquetry, string art,

2. Would love to try it.
flower arranging, glass bead making, glass blowing, graphic design, millinery, tatting, quilting

3. I do or have dabbled in it.
As an adult (college or later):
crochet, designing/pattern writing, dyeing, entertaining, felting, gardening, lace making, origami, sewing, scrap booking

Special geeky cases as an adult:
* balloon animal making (I got a balloon animal kit to make tetrahedral models for a science textbook photo shoot. Then, I played with the left over balloons.)
* paper making (as part of a science project in college)
* soap making (as part of a chemistry class)

As a dabbler young ‘un:
appliqué, basket weaving, beading, book binding, calligraphy, candle making, doll or toy making, embroidery and cross-stitch, jewelry making, macramé, mosaics, needlepoint, painting or drawing, papier-mâché, poetry, pottery, rug hooking, story telling-acting-stage work, weaving, video/film making, wood carving

As an obsessed young ‘un:
music (piano, clarinet, harp, trumpet, recorder)

4. Love it! This is my thing.
baking, cooking, knitting, pattern editing, photography, writing

And I have plans to start this up again: music (cello)

WHEW!

I was a very crafty kid, wasn’t I? When I was younger, I was very interested in arts and crafts. Between my artistic dad, my crafty mom, The Best Elementary School Art Teacher in the World, and my many years as a Brownie and a Girl Scout, almost every art or craft whim that tickled my fancy was indulged. My parents’ house is still filled with some of my more successful (but still childish) works of art.

A parting photo
MorriganGettingClose.jpgGuro asked to see Morrigan again. So here she is. I’m mere inches away from finishing the body. I’ve shaped the front neck and divided for the front and the back. In a fit of insanity, I decided that I would knit the two fronts and the back at the same time. So I have three balls of yarn attached to the project.

I had hoped to finish the body by now, but my fingers are currently busy working on another super-secret project for Kristen. I was refraining from blogging about Morrigan because there were some interesting pattern developments that I didn’t feel like writing about. I will do so as soon as I finish the body.

Friday, July 27, 2007

Finished Object: Bunny Blanket Buddy

What do you do when you are sick of working cables on both right-side and wrong-side rows using 3.25 mm (US 3) needles? Well, you make something out of fluffy novelty yarn on ginormous needles, of course!

BunnyFull2.jpg

Pattern: Bunny Blanket Buddy or Blanket Bunny Buddy or some combination of those three words. Available for “free” from the Lion Brand website. (Actual retail cost: the personal information that you don’t want Lion Brand to have)
Yarn: Plymouth Heaven, 100% nylon (and 100% fluffy!), color 12 (yellow), 2 balls. Plus scraps of Rowan 4-Ply Cotton for embroidery
Needles: 6.5 mm (US 10.5) and 5.0 mm (US 8)
Notions: A little polyester fiberfill
Recipient: someone’s baby

BunnyFace1.jpgComments: I chose this pattern because it looked easy and kinda cute. But, much to my delight, I discovered that the pattern is very, very clever. The bottom part (from the neck down) is pretty straightforward. The most exciting bits are when you cast on and bind off for the arms. (More on that later.) But once you get to the neck—hold onto your hats!—all cleverness breaks out.

The head is double-knit! You knit the front and back of the head at the same time, creating a “pouch” to stuff later. The ears are shaped and attached to the top of the head using short rows! After stuffing, the top of the head is gathered like the top of a hat! So there is NO seaming at all. How nifty-keen is that?

I’m so pleased as Punch about this toy. I thought it would be boring and mindless, but it turned out to be an interesting knit and super cute. I knit up the toy in a couple of hours and then spent almost as much time embroidering the face. Artistic I am not.

BunnyEars2.jpgHelpful Hints:
• The pattern doesn’t say to WRAP AND turn when working the short rows. So I didn’t. Bad idea. Wrap those stitches to prevent holes. You don't even have to bother picking up the wraps because they will just disappear in the fluffiness.

• This kind of fluffy yarn is quite bulky and does not have much stretch. Therefore, when you cast on and bind off for the arms and ears you must choose your methods wisely. Traditional cast ons (like knitting on or the cable cast on) and bind offs can yield very stiff edges. I used a backward-loop cast on and a lace bind off and my edges are soft and flexible.

Wednesday, July 25, 2007

More Cosmic Twinness

Over the last couple of years, Rachel and I have gotten to know each through our blogs, email, and gmail chat. In that time, we have been surprised at the many things we have in common. Rachel says its cosmic twinness.

Because we know each other so well, it seemed perfectly natural to me when Rachel told me that she was going to come to Texas and wanted to visit me. She would be visiting friends in Austin and San Antonio and then would swing by Houston for a brief stay. “Sure I’ll pick you up at the bus station, let you sleep in my yarn room, and then take you to the airport!” I told her.

Now let’s step back a minute. Pretend that you aren’t a knitblog reader or a knitter. Pretend that you are normal a safety-conscious person. What would you think if a good friend of yours told you that someone who she met over the Internet was traveling halfway across the country to visit her and that she would be picking up said Internet friend at a bus station in a highly dodgy neighborhood and then letting this “friend” stay overnight at her house? Well when you put it that way . . . .

Luckily for me (and Rachel), we discovered that we had even more things in common. For example, neither of us are axe murderers, sex offenders, or sleezy men who created innocent knitblogger personas with the sole purpose of luring an unsuspecting knitter into a friendship so that they kidnap her and steal all her money. Whew! Are you as relieved as I am?

Sadly Rachel could not fit her Starsky into her luggage so we couldn’t do true Sweater Twins photos, but she did manage to click a few other photos.

RachelAndMe.jpg

Saturday, July 14, 2007

I'm such a geek

Seen on Roxy's blog:

Mingle2 Free Online Dating - Science Quiz


I scored 100% with no cheating--I even got the questions in life science (my weakest science subject) right.

Wednesday, July 11, 2007

In which I appear to be copying Rachel again, but I really didn’t

One of the many things that Rachel and I have in common is a complete lack of interest in pursuing other fiber arts and/or crafts. We don’t want to spin or sew or dye or what-have-you. However, Rachel recently delved into the dyeing world. And believe it or not, so did I. I swear we didn’t talk to each other before we did this.

Predye.JPGLast fall during the International Quilt Festival, I picked up a shiny hank of silk laceweight from the Habu Textiles booth. I wasn’t so happy with the white color, but the person in the booth assured me that it would dye easily. I particularly wanted this yarn because it is reeled silk rather than spun silk so I bought it figuring that I would worry about dyeing it at a later time.

Then, last month I was shopping at KPixie and happened upon some natural colored cobweb-weight “pashmina.” Twelve dollars! One thousand yards! Click the “add to basket” button! (I don’t know if they carry this anymore. I can’t find it on their website now.) In the photo, the silk is on the left and the pashmina is on the right.

InJars.JPGNow that I had a second hank of blah colored yarn, I had to do something about both. Hey Kool-Aid! (That’s from a commercial, in case you young ‘uns don’t know.) I went to the store with the intention of buying pink and red Kool-Aid. I’m so predictable. Well, there are a lot of varieties of Kool-Aid including a handful of pinks and billions of reds. So I grabbed several hoping to find colors that I liked. I settled on Slammin' Strawberry Kiwi for the pashmina and Cherry for the silk.

1stDye.JPGAt first I tried the microwave method—you know, shove yarn in a Mason jar and nuke. That resulted in splotchy yarn. I was not happy. I decided that the pink pashmina was done well enough and I was worried that if I tried to dye it again, it would felt. (It threatened to felt after the first dyeing process and I really didn’t want to chance it.) However, the Cherry silk needed serious help. So back to the store for more Kool-Aid.

FYI—When you use those self-check out things at the grocery store, after scanning something you have to put the item on the scale thing on the end so that it can make sure that you’re not stealing. The self-check out freaks out if it doesn’t detect an item being placed on the scale thing. The scale thing CANNOT detect individual Kool-Aid packets. If I ever hear, “please put the item in the bag” again, I’m going to scream.

The partly red silk and additional Cherry Kool-Aid were cooked in a pot on the stove—not crammed Mason jar this time. I wanted the yarn to swim. The results are perfect. Now I have to figure out what to do with my new pink and red yarns.

PinkOutside.JPG2ndDye.JPG


Foreshadowing things to come

The title of Rachel’s latest post implies that she will be showing more things that she doesn’t normally do. *cue Twilight Zone music* I am also planning to show something else that I don’t normally do. It’s entirely possible that Rachel has been working on the same “art” that I am. I worry that she’s going to beat me to the punch again. So here’s a sneak preview of my extra-extra-curricular activity:

HexPleat1Front.jpg

Friday, July 06, 2007

Finished Object: Katherine (Sal Crochet Cap)

Kat2.jpg

Pattern: Sal from Rowan 31, one size
Yarn: Rowan 4 ply Cotton, color 120 Orchid, less than 1 ball
KatScout.JPGHook: 3.75 mm (US size F)
Peter’s Comment: I don’t think that’s going to keep your head warm.

My Comments: I think it’s a cute cap, but I’m not sure it’s cute on me. Sort of hippie chick. But as Drew says, it will be good for bad hair days.

I tried very hard to get a good close-up photo of the cap on my head, but it was not working. All photos were either poorly framed or out of focus. So I had to find a better model. First, Scout was recruited. But despite her best efforts, she couldn’t pull it off. The hat was simply too big for her. Plus, she put it on inside out. Silly cat can’t dress herself properly.

So I had to construct “fake Laura head” out of a tripod, an inverted bowl, and one of Peter’s black running shirts (don’t worry, it was clean).

KatEdge.JPG

I actually finished this cap more than a week ago, but didn’t get around to blogging about it because of an insane work schedule. Though, it turned out to be a good thing that I didn’t blog earlier. I think the hippie-chick hat may have prevented me from earning a . . .

Rockin’ Girl Blogger Award

Whoo Hoo! Rockin’ Valley Girl Agnes nominated me because I’m a scientist knitter. Who knew that geekiness could turn into Rockin’-ness?

RockinGirlBlogger.jpg

Now it’s my turn to nominate five more bloggers for a Rockin’ Girl Bloggers award!

How could I not nominate Rockin’ Rachel? She’s my sweater twin, my Best Blog Friend (according to her), and the co-founder of the Apathetic Sock Knitters Club.

Then Superhero Sarah gets the tap. Sarah is a mild-mannered archeologist by day and Microfarmer Sarah by night (and weekends). She has 5 cats, 2 dogs, 1 llama, 4 goats, 12 chickens, and 6 SHEEP! She’s going to adopt me so that I can live on her farm.

Next up is Über-creative Elizabeth. I love Elizabeth’s blog because she allows us to peek into the mind of a knitwear designer. And she’s a great nature photographer—but watch out for the bug photos if you’re easily creeped out like I am.

Of course Biker Debby is rockin’. After all, she has a PINK bike. Debby is also co-hosting this year’s Tour de France KAL in the most fun way. Compete for jerseys! Learn about the Tour!

Last but not least is Mad Scientist Jeanne. Jeanne has been conducting experiments in her kitchen as she dyes with natural dyestuff. And she does math during these experiments! What could be more rockin’?