Remember my bobble-ful Serenity sweater? I threatened to cut off all the bobbles when I got the sweater back from Yarntopia. Well, the sweater is still there, but I decided to try some practice bobblectomies to see how annoying it would be.
So here it is, just for you, my first bobblectomy!
(click photos for biggie versions)
The starting swatch. I made a few practice bobbles (just in case I screwed up) and then started the Serenity cable pattern. I'm using some very bright, leftover Encore.

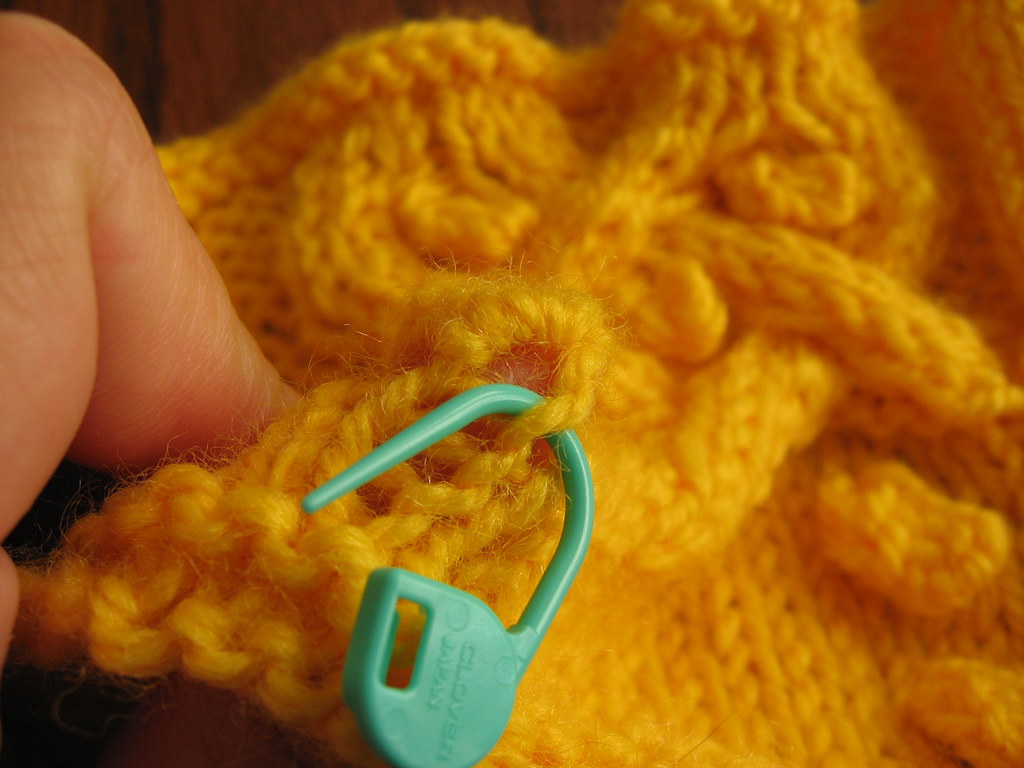
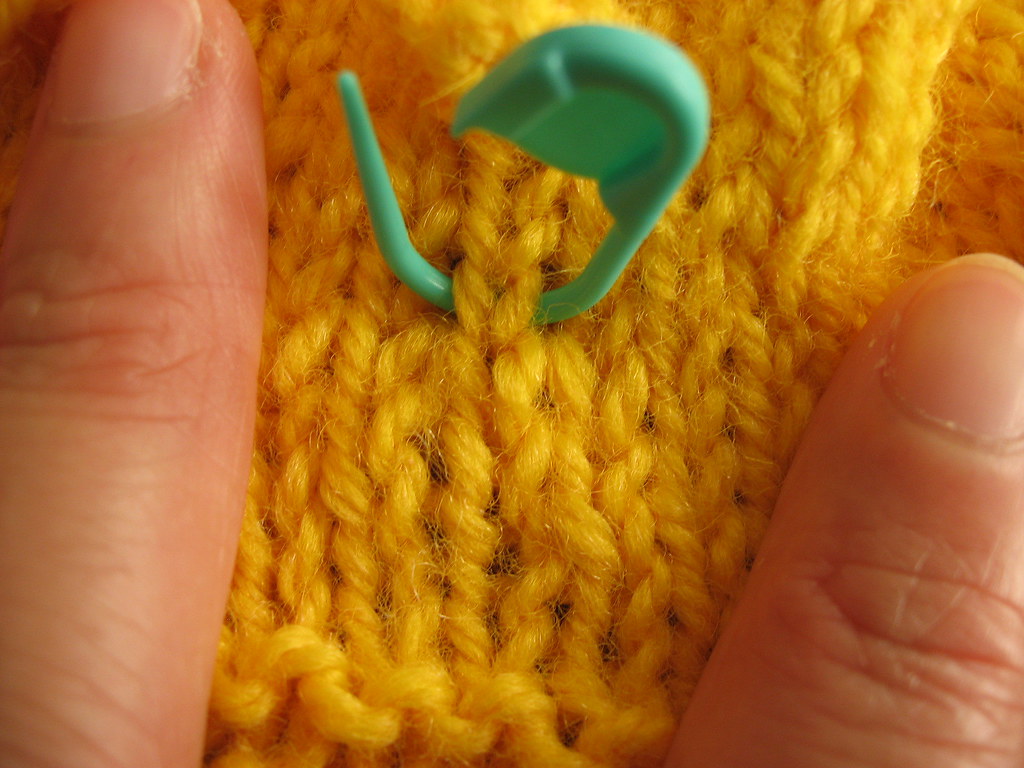
First, anchor the stitches above and below. This will prevent the stitches from dropping and will give you some guidance after the bobble is gone. Leave the stitch markers in place until you're happy with your work.
Put a stitch marker in the stitch below. This bobble was started by k1, p1, k1 into one stitch. So here's a marker in that stitch.
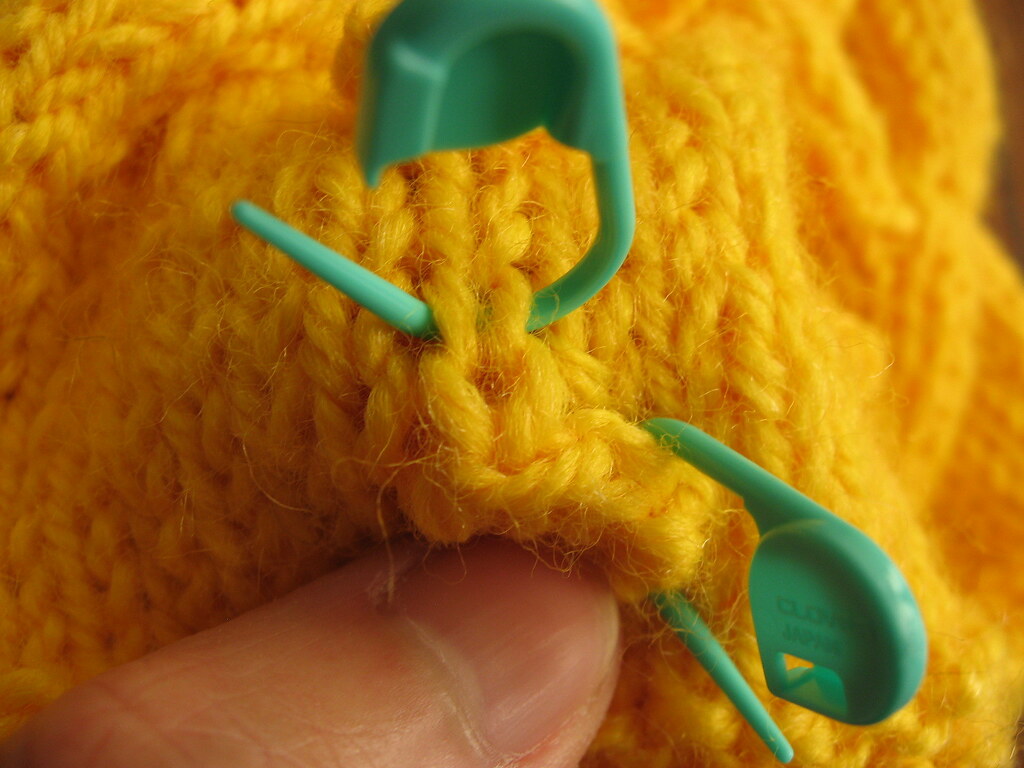
Put a marker in the stitch above. Note that the marker goes through both legs of the stitch above! This bobble ended with sl1, k2tog, psso. The big-ish stitch below the marker in the photo was the last stitch of the bobble.
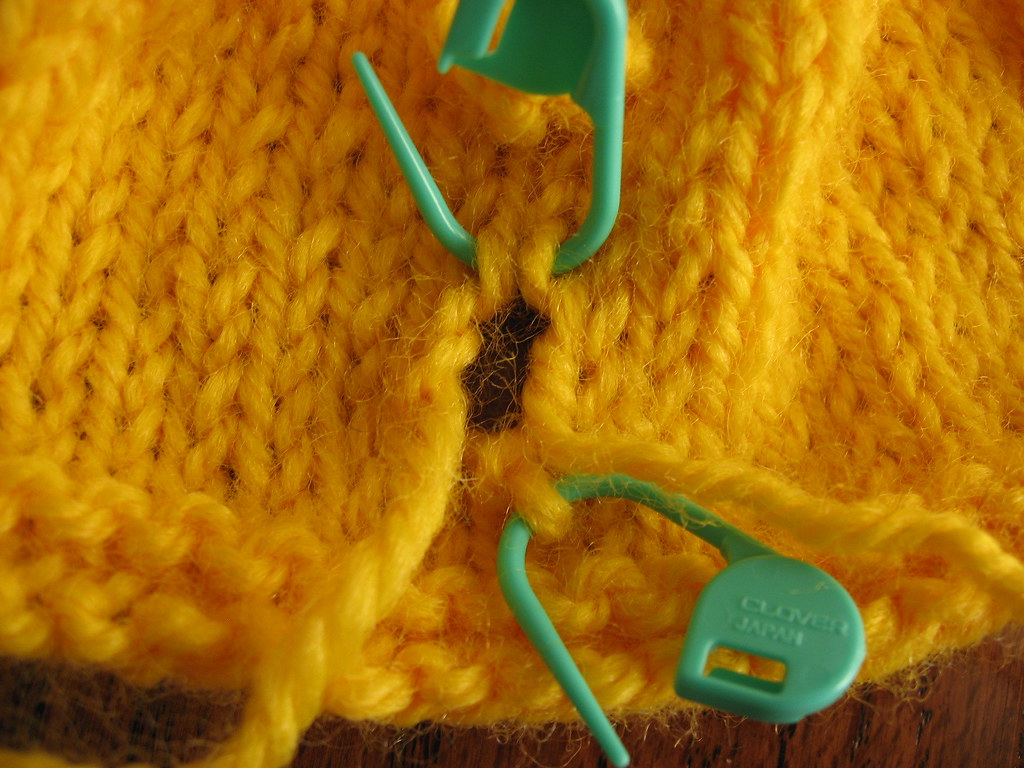
Find the middle stitch of the bobble. I put a marker in just to show the stitch. You don't have to find the stitch exactly in the middle, but you should be close. CUT one of the legs of the middle stitch.

Unravel both ends. The bottom will unravel easily, but the top will need to be picked out. When you're done, you should have one end on the right of the hole and one end on the left.
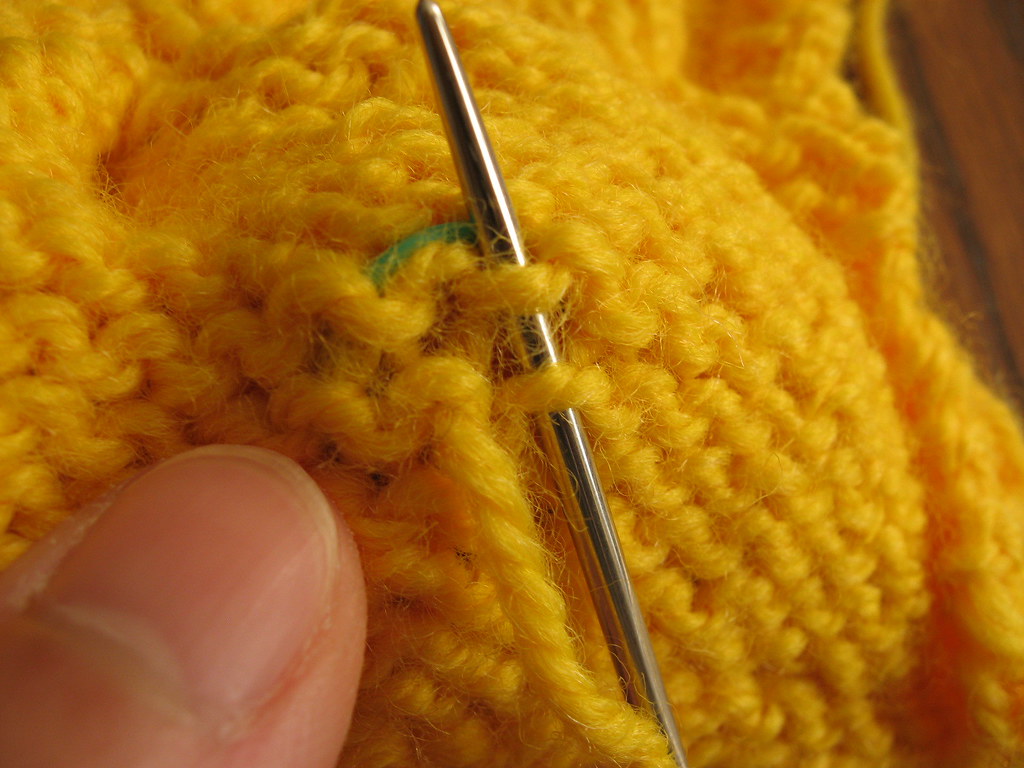
Now you need to replace the bobble with a stitch—in this case a knit stitch. I'm starting with the end on the right of the hole. First, thread the yarn up (from back to front) through the stitch below (your stitch marker should still be there to help you).
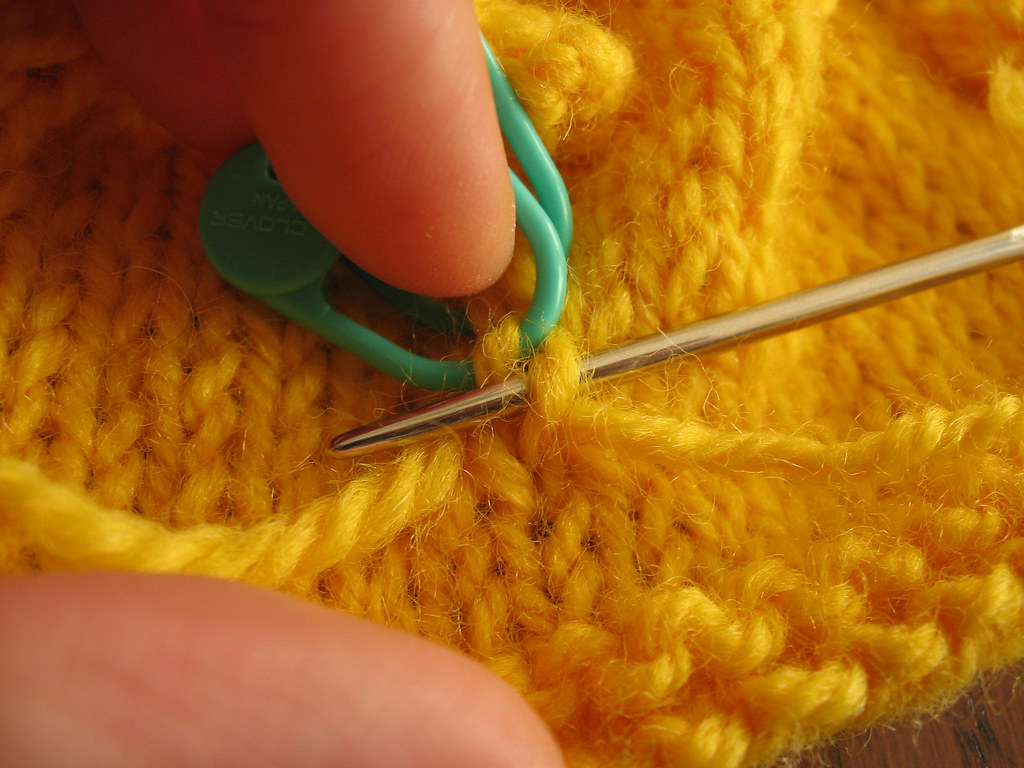
Next, thread the yarn through the stitch above—go through both legs of the stitch! Again, use your stitch marker for guidance. (Your needle will go down through the right leg and up through the left leg. Photo shows both happening at once.)

Finally, thread the yarn down through the stitch below.

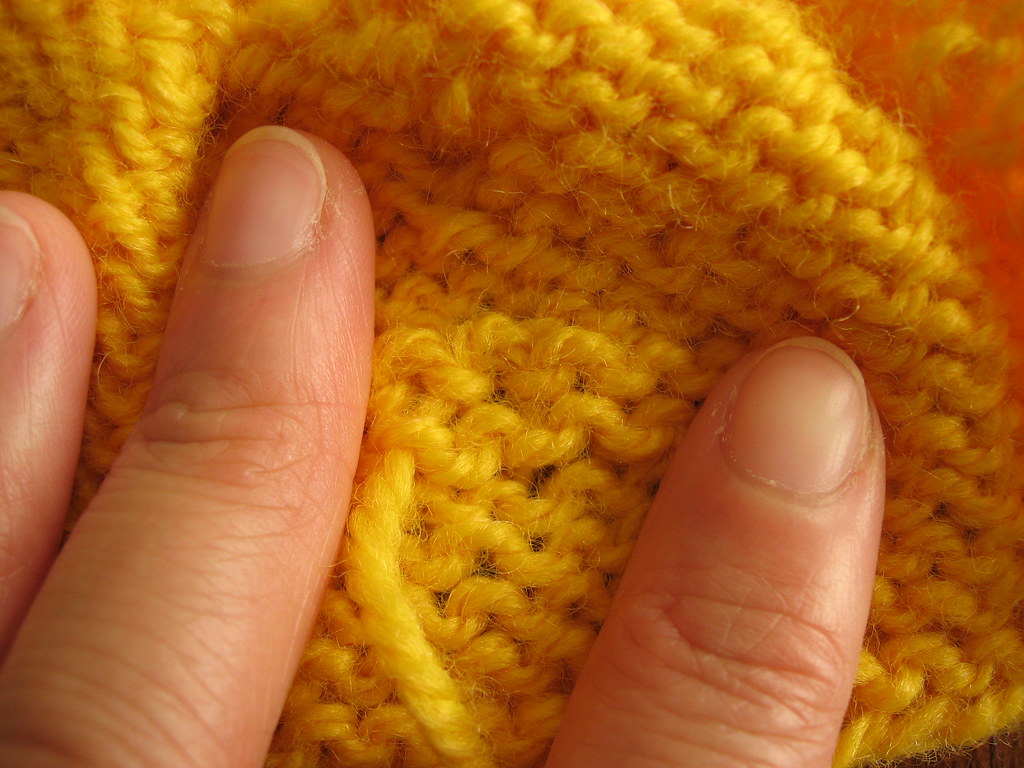
Tada! A new stitch where the bobble used to be! I removed the bottom marker but left the top one so you could see where the new stitch was created.
Now thread both ends to the back of the work and weave the ends in opposite directions. The end that was to the right of the hole should be woven to the left, and the end that was to the left of the hole should be woven to the right. Use this article by the s'wonderful Theresa for help in weaving ends.
Weave through a few stitches in each direction, making the back of the work nice and tidy. Trim ends.
And here's the cable pattern with one bobble removed. I followed the same technique that I showed above except I replaced the bobble with a purl stitch.

The whole process worked as I anticipated it would, but I'm not sure I would want to repeat it so many times for the sweater. Plus, the thought of cutting all that beautiful yarn into short bits makes me cry.

13 comments:
Wonderfully clear tutorial! I admit I will probably never use it, however, as I don't hate bobbles enough :)
Excellent tutorial! I still think Serenity looks good with the bobbles, *despite* their bobbl-iciousness. So no need to cut all that beautiful yarn.
Great tutorial, but your right, I don't think I'd want to do it for that many bobbles either.
Eep.
Another great tutorial. I think you need to really hate bobbles to do that for a whole sweater though... And Serenity was awfully pretty, even with the bumps.
Great tutorial. I think buckets of patience would be needed to do that to the entire sweater though...
Wow, that worked well! I don't think I would want to do it either though.
Wow!
Cool.
Though I don't see myself making accidental bobbles, the unfortunate placement of a bobble or two once sweaters are tried on, might one day call for this!
BOBBLECTOMY!! (Also, *hug!*)
That's fantastic! So. Much. Talent!!
I say this with deep admiration...you are even more obsessive than I am. Thank you!
I don't hate bobbles, but if I did, you can bet I'd sit there one snowy weekend and get them *all* out. Yikes.
While I'm a firm believer that friends shouldn't let friends knit bobbles in the first place, it's good to know that this is available.
Geen-yus.
My bobble aversion makes it unlikely that I will ever need to make use of the tutorial, but I feel comforted knowing that it's there, in case some sadist ever makes me add bobbles to my knitting at gunpoint or something. How many bobbles are there in the sweater that gave rise to this tutorial? You could do one a day and have a bobble-free sweater...well, eventually.
Post a Comment